DIY door decor & Christmas wreaths with a personal touch
The plain-Jane basis for each of these handsome Christmas decorations is an ordinary ready-made wreath of white pine or balsam. We asked a talented designer-florist for some decorating ideas, and these are the lovely easy-to-copy results.
LEMON-AND-LIME WREATH
Lemons, limes, walnuts, cedar sprigs and sweetgum tree balls were added to this balsam wreath for a rich, unusual color effect. For brown color and woody texture, pinecones would be as effective as sweetgum balls.
MATERIALS NEEDED: Balsam wreath; sprigs of cedar; lemons and limes; walnuts; sweet-gum-tree balls (or tiny pine cones) 2″-wide chartreuse and light green velvet ribbon to wind, around wreath; extra Chartreuse ribbon for bow; clear shellac; wire; extra-strong white glue.
DIRECTIONS: Wire cedar sprigs to wreath to add Chartreuse-tone color. Wind wreath with Chartreuse and light green ribbon, securing ends on back. Run wire through back of each lemon and lime, and cut wire, leaving 3” ends (FIG. 1). Dip fruit 9″ in clear shellac and hang by wire till dry.
Secure lemons and limes to wreath by twisting wire ends around stems of greens. For placement of fruit, see photo. Cut a quantity of 3″-4” wires, dip an end of each into glue, and insert one in the small natural aperture at base of each walnut and in a hole of each sweetgum tree ball. Let dry. (If using pine cones, twist wire around bottom leaves of each cone.)
Attach nuts and balls (or cones) to wreath with their glued-in wire stems. Make a Chartreuse velvet-ribbon bow with streamers; wire to wreath at top, right, and drape ends as shown (see photo), securing billowing streamers to wreath with glue as needed.

GOLD WREATH
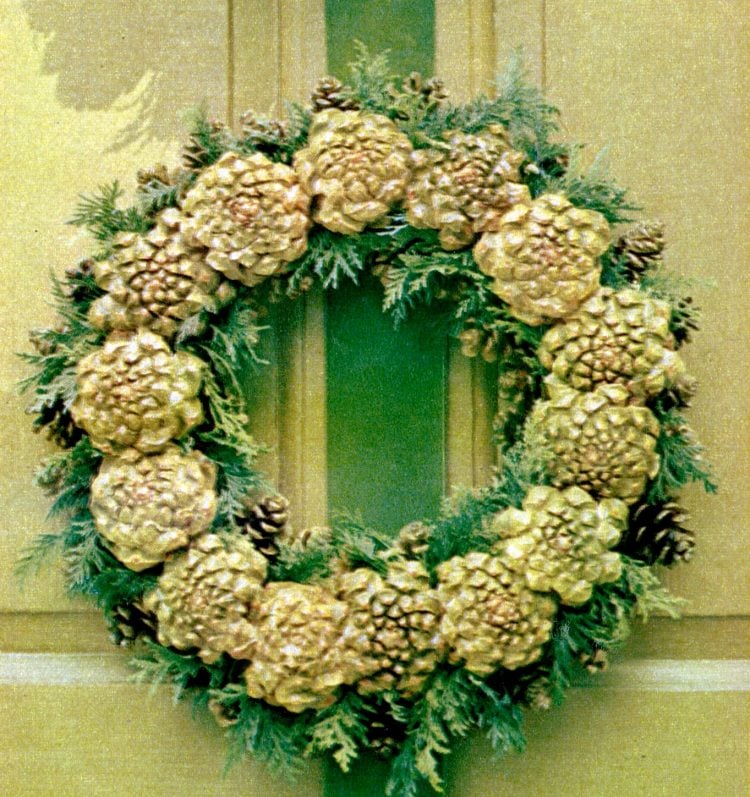
Pine was added to this balsam wreath, and the whole spraypainted gold. Shiny Christmas balls, sliced and painted pine cones, and a metallic ribbon-bow complete the elegant all-gold look. Mistletoe sprigs add a white accent.
MATERIALS NEEDED: Balsam wreath; pine Sprigs; large pine cones; small and medium-size gold Christmas balls on wire stems ( available at dime stores); 2 yards of 3” metallic gold ribbon; gold spray paint; 4-6 sprigs each of artificial mistletoe and apple blossoms (or similar accents); wire.
DIRECTIONS: Wire pine sprigs to wreath for variety. Saw pine cones in sections, crosswise (or slice with heavy scissors). Wire to wreath, alternating or combining large and small flowerlike pinecone sections for an attractive pattern (for placement, see photo). Spray wreath and cone sections with gold paint. When dry, add gold balls, mistletoe, apple blossoms, wiring stems to wreath and using balls in clusters between pinecone flowers. Make a gold ribbon rosette bow with streamers and attach with wire at bottom of wreath.

CHERRY WREATH
A small white-pine wreath is secured to a polystyrene-foam base, then loaded with bright fake cherries and shiny balls. For a new way with a wreath, cover the wreath back with pine and hang it on your nicest mirror.
MATERIALS NEEDED: White-pine wreath (diameter of ours is 24”); polystyrene-foam wreath shape to fit back of pine wreath; sprigs of white pine; artificial cherries on stems (a quantity in red, a few in purple) ; red Christmas balls on wire stems (available at dime stores); 1 yard of 3″ red velvet ribbon; 3” wood picks (or skewers) ; long wire hairpins; wire.
DIRECTIONS: Wire polystyrene-foam wreath to back of pine wreath: then cover back with pine sprigs, using hairpins punched into foam to secure sprigs. Wire stems of red cherries together in groups of 3 and 4, and purple cherries in pairs. and then wire to wood picks. Insert picks through pine wreath into polystyrene foam: in the same way, insert wire stems of Christmas balls. Add cherries and balls, in varying depths, to create a circle that is irregular at edges but with a pleasingly balanced design, following the placement pattern shown. Tie a red velvet bow with 12” streamers and attach at top with wire. (Our wreath is hung with red velvet ribbon on a gold-framed oval mirror.)

Edwardian elegance (1970s)
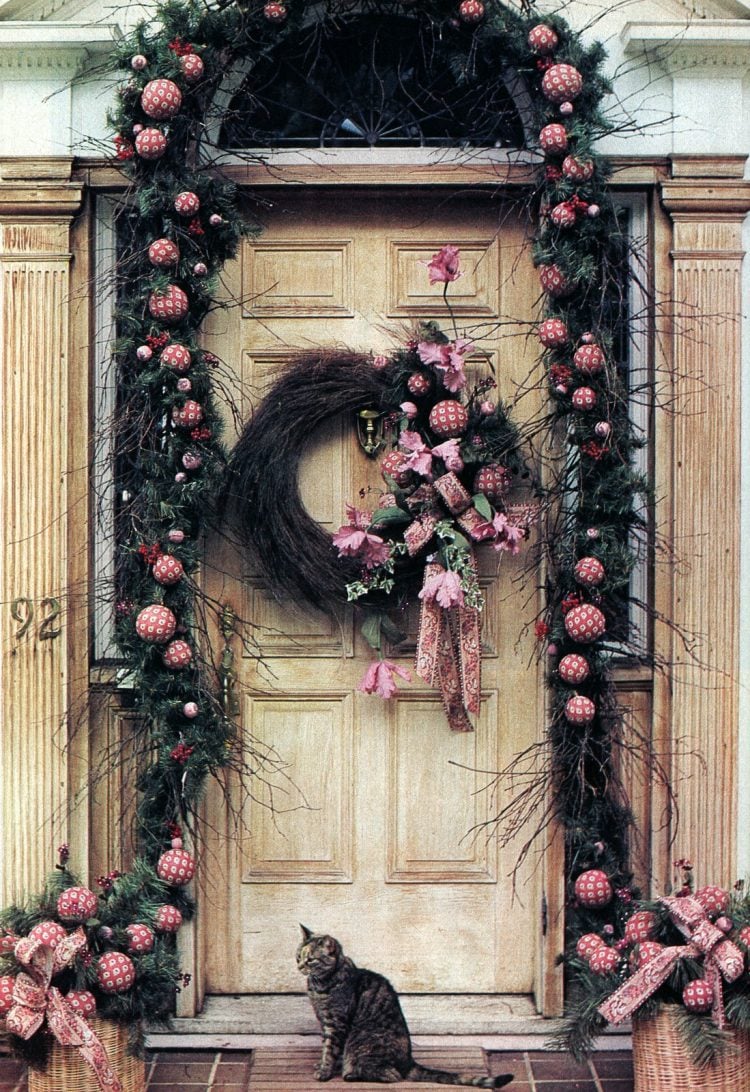
It’s easy with wide tapestry-stripe ribbon wrapped on plastic-foam balls and tied into generous bows.
Door decorations designed and photographed by Louis Nichole

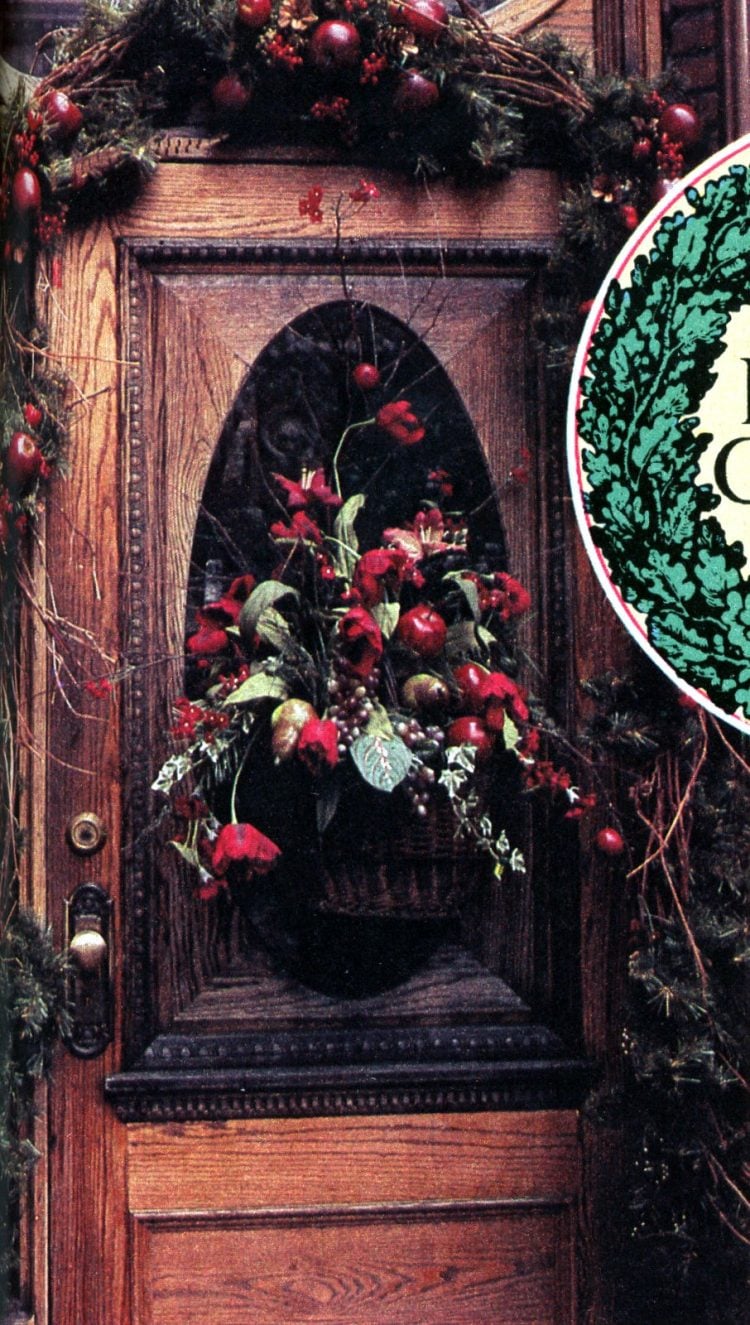
Wicker basket holds “antiqued” fruit.

Nostalgic old sled is center of attention

Stag’s head and antlers are paired with pheasant feathers and greenery

Vintage fabric and ribbons for this front door Christmas decor
Colonial door, dressed with fabric-wrapped balls, brocade ribbon bow on dried-weed garland and wreath.

Asian-themed wreath
Oriental theme features black-satin ring “wreath” and doll, trimmed with sleek long tassels and brocade ribbon.

Natural wreath door decor
Simple but sophisticated, made with pinecones, seed pods, weeds, wrapped with grapevine.

Seashells and pine
A refreshing combination for the beach-lover and shell collector.

Christmas sampler
A stitched sampler big enough to cover the entire door, is done with easy yarn embroidery, appliqués, on canvas.

Opulent swags and baby’s breath for this vintage decor
Trims are tasseled fringe, lacy ribbon and drapery tiebacks.

A welcoming Christmas wreath invites all callers to come inside and share the Christmas spirit with you
The traditional symbol of welcome and hospitality is a wreath of fresh greens, trimmed to a fare-thee-well.
To make your own, start with a heavy wire frame 18″ in diameter, and use florists’ twine to attach greens: hemlock, yew, pine, whatever is available, and enough to make a fat, thick wreath.
Then trim it with glittering ornaments, pine cones, perhaps a miniature sleigh, frosted fruits or attic treasures. Finish it off with a satin or velvet bow if you like, hang it on your front door and get ready to welcome your friends.
Vintage holiday decor: Della Robbia old-fashioned Christmas wreath
Artificial fruits, gold and red ribbons, a wood-carved angel

Glittering Christmas wreath of tiny ornaments
Ornaments along with frosted fruits and flowers, bits of costume jewelry

Bird’s nest wreath
This vintage Christmas wreath craft is shown complete with two toy birds, has a moss green velvet bow

Santa’s sleigh wreath
This cute holiday wreath is trimmed with a berry tree, ribbon bow and streamers

Old-fashioned Christmas wreath with miniature toys
This wreath has a tiny red velvet boot, a candy cane to please the children.


A simple old-fashioned wreath
Here, greens are decorated with a gold eagle, and large and small shining Christmas tree balls.

To decorate your door
Collecting materials for these handsome Christmas doorways can be a family project that’s as much fun as making the designs.
Nearby woods or evergreen trees in need of trimming provide abundant materials. Go out and look — you’ll be amazed at the marvelous variety of cones and seed pods that Nature uses to replenish her forests. Then freely substitute the treasures you find for the materials we have used, letting your imagination be your guide.
Yule tree
This large-scale stylized tree beautifully decorates a modern doorway. Note the careful choice of materials for textural interest: The velvety magnolia seed pods; the close crisp scales of Norway-spruce cones. These also offer variety in form and color as the eye travels to the dramatic “flowers” that are slices of large sugar-pine cones from California.

Golden Nosegay DIY wreath
Inspired by the Victorian tuzzy-muzzy nosegay, ours gleams and sparkles against a bright red door. This jewel-like creation is composed of cones and seed pods—with some used upside down for variety. The small sliced- cone “flowers” echo the large center one and also repeat the circular motif, giving unity to the design. Note the rhythmic movement of the outside leaves. The dominant gold is enhanced by use of the gray-green foliage of fir.


Three Wreaths craft
The Trinity is symbolized with dignity and restraint in three beautiful wreaths, hung on the charmingly simple door of an old house in Connecticut. No artist but Nature could develop the shadings of the pinion cones. Fresh arborvitae sprigs repeat the color harmony, and a bow of waterproof velvet ribbon provides a rich contrast to the rough cones


Victoriana wreath idea
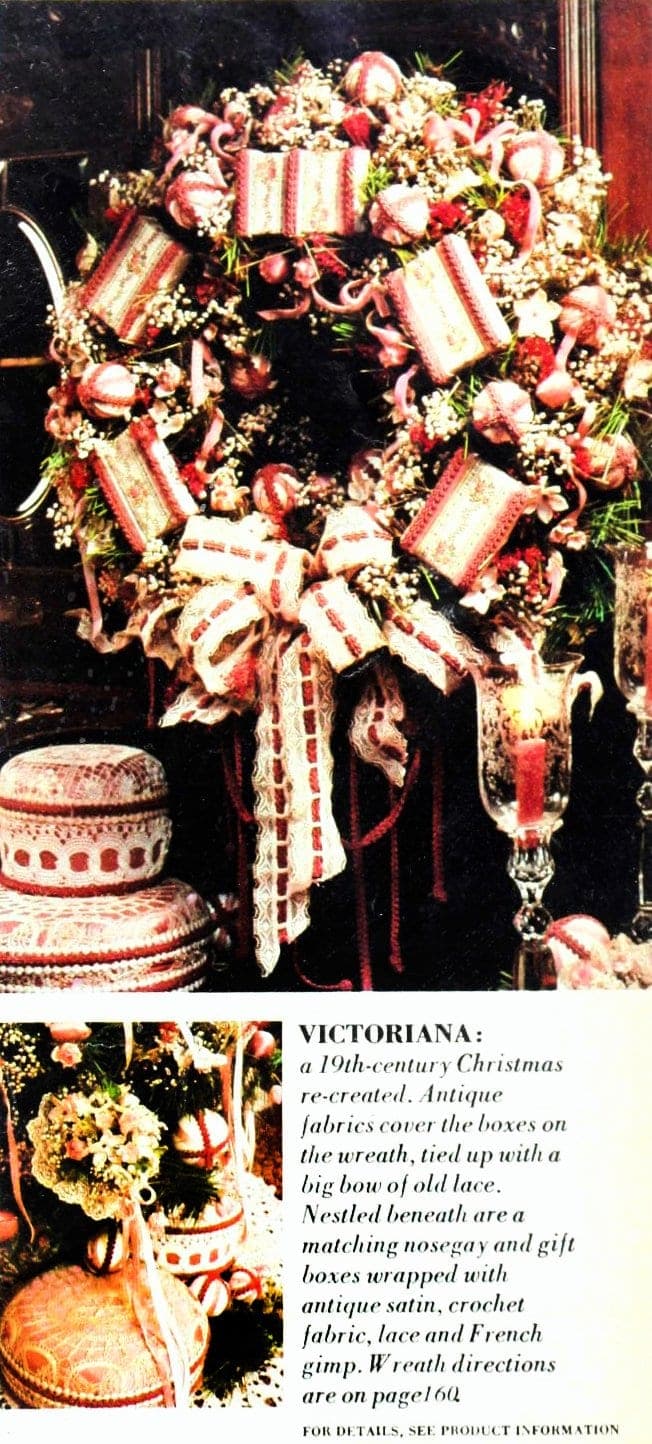
A 19th-century Christmas re-created. Antique fabrics cover the boxes on the wreath, tied up with a big bow of old lace. Nestled beneath are a matching nosegay and gift boxes wrapped with antique satin, crochet fabric, lace and French gimp.

A romantic Christmas wreath idea
Cream- and apricot-colored antique fabrics, apricot-lacquered berries, baby’s breath and silk flowers transform a room into. an enchanted winter garden, The 19th-century eyelet and satin bow is wired in the French manner with flowing streamers, At left, a detail of the wreath.

Popcorn and cranberry wreath
Popcorn and cranberries, white baby’s breath and French reproduction greenery make the traditional Christmas wreath. When stringing the popcorn and berries, make enough fora centerpiece, nosegay and baskets.


Fruit and vegetable Christmas wreath idea
The Christmas decoration features lots of fruits — kumquats and apples, pears and purple grapes, along with artichokes and walnuts — plus pinecones and sprigs of evergreens.

Ideas to decorate your front door for Christmas
Is there a warmer way of saying “Merry Christmas” and “Please come in!” than a front door that’s bedecked with greens and trimmings?
The doorway at the top has a swag of bright green holly entwined with red velvet ribbon. The red and green streamers are tipped with Christmas balls. In the center, the half-bucket is filled with greens and bright red winter berries.

Oval hemlock wreaths
Below: Oval hemlock wreaths are hung on the sidelights. They’re sprinkled with nuts and fruits and accented with red ribbon bows. Another garland of hemlock is draped over the railings. The shrubbery is dotted with twinkling Christmas tree lights.

A leafy wreath in neutrals, tied with a pale gold bow

How to make an old-fashioned Christmas wreath with aluminum foil
BELIEVE IT or not, you can quite easily make beautiful, inexpensive Christmas wreaths in your own home!
All you need is a roll of 18-inch heavy-duty aluminum foil, a few common Christmas props, and a tiny bit of your time.
The wreath is made by crushing the foil lightly and shaping it into a circle. When the shape is completed, the wreath comes to brilliant, sparkling life with the addition of ribbons and ornaments. The mirror-like surface of the foil reflects the color touch to create a beautiful and professional-looking holiday decoration.
Decorations can begin simply with ribbon bows, or involve colorful Christmas tree ornaments or lights.
Foil wreaths provide an ideal way to display your Christmas cards. The cards are simply attached on the wreath with straight pins.
Decorate the wreath with candy or cookies, and you have a colorful holiday treat for young visitors,
Foil wreaths can be made small for your windows, or large for your front door.

HERE’S HOW to make the inexpensive basic foil Christmas wreath:
1. Remove a 25-ft. roll of 18-inch heavy-duty aluminum foil from the box, and roll it out in a long streamer on the floor.
Standing at one end of the foil, lift and begin crumpling it — shiny side out — reducing the width to approximately — six inches. As you crumple down the length of the foil, form it into a large circle between 2 and 2-1/2 feet in diameter.
3. As the circle is completed, begin overlapping the foil as you crush it, keeping the shiny side out and forming it over the previous layer of foil until the entire 25-ft. roll is used.
4. While shaping the wreath. be careful to form one surface with the shiny side of the foil facing out, so that the back side of the wreath is the dull side and flattened to go against a wall.
5. To hang the wreath, tie a loop of string around the top and loop over a picture hanger or nail. With large wreaths, also attach loops to the sides and support them with small tacks to prevent the weight of ornaments from causing the round shape to sag gradually over a period of days.
HERE ARE some of the ways a foil wreath craft can be decorated:
Ribbons — Attach one large ribbon bow to the wreath at top or bottom. For added color, add a dozen or more small bows around the wreath, attaching them with straight pins.
Christmas cards — Attach a colorful multi-loop bow to the top of the wreath and place a gold ornament in its center. Christmas cards are. placed around the wreath with straight pins. Make the wreath slightly smaller (approximately 18-20 inches in diameter) and crush tightly for added strength to support many cards.
Ornaments — Attach a large how at the top, then add tree ornaments of one or two colors by hanging from the foil with regular ornament hooks.
Lights — Take a string of Christmas tree lights and push them through the foil from the back of the wreath. They should be spaced evenly around the circle, using the wreath shape to hide the wire. Complete the wreath with a large ribbon bow at top or bottom.
CAUTION: Make certain the string of lights is in good condition. A frayed cord may contact the foil and the wreath become electrified!


