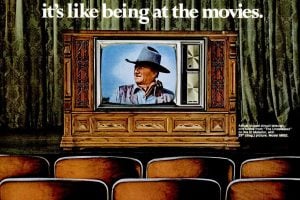
How to enjoy your GE Porta-Color Television receiver (1967)

Introduction
Because of the outstanding engineering developments and manufacturing skill of General Electric, you may be assured that the Porta-Color receiver you now own is the finest color television possible.

The old television controls – dials and knobs
For complete step-by-step simple tuning instructions, read “How to enjoy your GE Porta-Color Television. (Channel indicator, VHF tune, VHF select, For UHF set U at indicator, UHF select and tune)

About the TV’s vertical hold control/horizontal control (at rear):

How to add color to your TV when it’s tuned
Now you add color to your correctly-tuned picture by adjusting the controls in steps 4 and 5:
STEP 4: Too Little Color / Excessive Color:
Rotate the COLOR control clockwise until NATURAL colors appear (you must be receiving a color program). If the color control is turned too far to the right, excessive unnatural colors will be produced.
The best color picture is produced when the colors in the picture are NATURAL. If no color is present, you may have turned the fine tuning control too far to the left. Repeat STEP 3.
STEP 5: Too Green / Too Purple:
The TINT control must be rotated for proper flesh colors to make all other hues correct. Technical difficulties in transmission may cause skin tones to vary from one side of the screen to the other. In this event, adjust the TINT control for correct skin tones near the center of the screen.

Reception peculiarities & interference on a vintage TV set
Television program transmission difficulties will often produce picture disturbance whose appearance can be similar to or identical with electrical and static disturbances. Usually such difficulties are announced on the sound or picture portion of the program, whichever is not affected.
If you are in doubt whether the trouble is in the transmitter or your receiver, simply turn your channel selector to another station and program. If the trouble is not present, it is caused by studio, transmitter or network difficulties on the first station. The most common types of television interference are as follows:
IGNITION Horizontal streaks and splashes on the picture are caused by ignition interference from trucks, automobiles and airplanes. Some electric shavers and other small motor devices may also cause this difficulty.
RADIO FREQUENCY SIGNALS The interference shown in this illustration may be caused by short-wave transmitting and receiving equipment. The interference produces moving ripples or diagonal streaks, and, in some cases, causes loss of contrast in the picture.
MULTIPLE IMAGE (GHOSTS) Ghosts are caused by the television signal following two paths. One is the direct path and the other is reflected from tall buildings, hills or some other object. The signal following the reflected path always arrives later at the receiver and produces the second image. Relocation or reorientation of the antenna may improve the reception.
WEAK SIGNAL (SNOW) If your receiver is located in the fringe area of a television station where the signal is weak, the picture may appear covered by irregular dots which give it a snowy appearance. When the signal is extremely weak, part of the picture may be blotted out. It may be necesssary to install a special antenna to improve the picture under these conditions.
CAUTION: Your receiver requires air for cooling. DO NOT drape a scarf over the back of the receiver or place the receiver in a location that will block circulation of air through the receiver bottom and back. DO NOT place objects with rubber feet or items impregnated with possibly harmful chemicals on the cabinet surfaces.

Magic Memory Tuning on the General Electric Color TV
CAREFUL READING OF THE FOLLOWING INSTRUCTIONS… will help you to obtain the best results from your General Electric Color Television Receiver
The small knobs on the front of the receiver have reference indicators. Quality Control at the factory has adjusted your receiver with test instruments so that optimum picture performance is attained when the indicators are pointing straight up.
If signal conditions in your area require a change in MAGIC MEMORY settings, readjust the controls according to the following instructions. After the readjustments are made, pull off the knobs and push them back onto the control shafts with the indicators pointing straight up. This allows you to return to your favorite adjustments immediately in case of an accidental misadjustment.

In the following step-by-step tuning procedure, Steps 1 through 3 are performed using a black and white picture. Color is added in Steps 4 and 5.
Turn your PORTA-COLOR receiver ON by rotating the OFF-VOLume knob gently clockwise until the MAGIC MEMORY indicator points straight up for normal sound volume.
STEP 1: Turn the COLOR control fully counterclockwise (all the way to the left). This will produce a black and white picture on all programs, even color. Make all adjustments from Step 2 through Step 3 while viewing the black and white picture.
STEP 2: Rotate the BRIGHTness control until the MAGIC MEMORY indicator points up as in the illustration on the card.
STEP 3: Select and tune each channel in your area as follows: A. For VHF CHANNELS (2-13). Rotate the VHF CHANNEL SELEC-TOR knob until the desired channel is indicated. Rotate the VHF TUNING knob clockwise (to the right) slowly until the edges of detail in the picture take on a beady white or broken-up appearance as shown below. Now turn the tuning knob slowly counterclockwise until the beady or broken-up appearance just disappears.


