1955 Valentine’s Day heart cross-stitch: Sweet vintage needlework you could make by hand
In the postwar years, hand embroidery remained a popular domestic art. The heart motif, long favored by folk artists, had wide appeal: Simple enough for beginners, but with enough symmetry to reward precision. These particular designs, adapted from old Hungarian patterns, were shown stitched onto crisp white linen with red and black thread — bold, clean, and unmistakably handmade.
- Congdon, Emma (Author)
- English (Publication Language)
- 112 Pages - 07/12/2022 (Publication Date) - David & Charles (Publisher)
Alongside the patterns came instructions for how to copy the design onto graph paper, transfer it with a carbon stylus, and choose the right type of thread depending on your fabric. There were also methods for working on fine linens where the weave was too tight to count threads — solutions drawn from real domestic experience, not from marketing copy.
These hearts were designed to be useful and beautiful — worked into the everyday, not displayed behind glass. A practical, tactile expression of care, made to last through wear and washing. See how to recreate these vintage designs below!
Hearts are for love
The labor of love that goes into the working of fine needlework could find no more fitting symbol than heart motifs, favorites of folk artists in many countries since early times.
These designs were adapted from old Hungarian ones. Embroider them in cross-stitch on household linens or aprons, skirts and blouses, or on children’s clothes; or knit them into gay ski sweaters.
You can work directly from this page, or copy the designs on graph paper.

How-to instructions for heart cross-stitch needlework
THREAD FOR THIS HEART CROSS-STITCH
Your choice of thread depends on the material on which you work and the size of cross-stitches you want. On most linens, six-strand embroidery floss is best, and any number of strands may be used to produce the effect you like. On other materials, pearl cotton is effective; on wool, woolen yarn is generally used.
TRANSFERRING A DESIGN NEW METHOD
Materials: Old automatic pencil and No. 20 tapestry needle (to make stylus); typewriter or dressmaker’s carbon paper; graph paper in size and scale desired (paper with 10, 8, or 4 squares to 1″ is usually available in stationery stores); smooth surface, such as drawing board or breadboard, into which thumbtacks can be driven; blotting paper or cardboard.
Preparing design: Following photographs [above], copy a design, drawing each X of design on a square of graph paper. Count stitches carefully but draw X’s roughly, with crayons to indicate colors, if you wish. Squares of paper will keep embroidery uniform.
Making stylus: Remove lead from automatic pencil; in its place, push eye end of needle; adjust pencil so about 1/8″ or 1/4″ of needle point protrudes.
Transferring design: Cover an area of drawing board with blotting paper or cardboard; over it place fabric to be embroidered, then penciled design. Be sure lines of graph paper are parallel to threads of fabric. Thumbtack to board at top. Slip carbon paper between design and fabric; tack at bottom.
Holding stylus as nearly vertical as possible, push the point accurately through design and carbon paper at four points of each cross-stitch or corners of each square. Make a dot also at center of each cross-stitch to be worked, to distinguish between squares to be worked and those which fall between the Xs. Your design is now transferred to fabric, just as machine-stamped cross-stitch is, and is ready to be embroidered.
THREAD-COUNT METHOD
This can be used only on round-thread linens of which the threads can be counted easily. The weave should be even, with the same number of threads in each direction.
Work each cross-stitch over 2 or more threads, depending on the size stitch you wish. Be sure to follow threads of fabric exactly so work will be even. Threads must be counted also for any spaces between groups of cross-stitches.
CROSS-STITCH-CANVAS METHOD:
This is the method used on very fine linen, or any material where the threads cannot be counted easily. Cross-stitch or Penelope canvas is placed over linen temporarily, and serves as a guide for stitches. It can be bought in a number of different size meshes.
Cut canvas 1″ larger all around than fabric. Place fabric on smooth surface; lay canvas over it, carefully lining up threads of canvas with threads of fabric. Baste together, working from middle out to center of each of the four sides, then from middle to corners.
Baste all outer edges. Crease edges of canvas over edges of fabric, to keep fabric from fraying, and baste. When working, be careful not to catch stitches in threads of canvas or to embroider through the folded edges.
Work embroidery; snip canvas between groups of cross-stitches; pull out canvas and basting threads with tweezers.
More heart cross-stitch patterns you can buy today
- Puri, Gray (Author)
- English (Publication Language)
- 39 Pages - 12/27/2025 (Publication Date) - Independently published (Publisher)
- 1.Package includes: 1 x Embroidery canvas with printed pattern(7.87x7.87inch/20X20cm),1 x Embroidery thread card (contains adequate thread for complete project), 2 x Needles, 1 x English...
- 2.High-Quality Cotton Thread:100% Ecologycotton floss that is more brilliant in color and softer, finer, more Skin & Eco-friendly and more durable than ordinary threads,together with exquisite...
- 3.Pre-Printed & Easy to Stitch: stampedwith Nontoxic & Washable dye. Accurately pre-printed pattern,easy to follow instructions as well as Arab numbers, symbols andcorresponding number make the...
- 【Embroidery Kits for Beginners Adults】 Pink embroidery starter kits contains all the items need to embroider: embroidery fabric with pattern, hoops, needles, threads, needle threader,...
- 【Instructions and Videos】 Hand embroidery needlepoint kits comes with very detailed instructions; ⏭︎Scan the QR code at the upper right corner of the instruction manual to get video tutorials,...
- 【Embroidery Gift Set】 Heart flower embroidery kits will be perfect for Thanksgiving Day, Valentine's Day Anniversary, or birthday gifts; Or treat yourself to this funny cute embroidery kit! It’s...
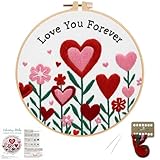
- Love Heart Pattern: Embroidery cloth is printed cute heart pattern and"Love you forever" which will provide great help for embroidery beginners. It is printed with ink and extra ink can be washed...
- Embroidery Kit For Beginner: Everything you need in one pack! Includes pre-printed fabric, easy-to-follow instructions, and premium tools—no experience required.
- Complete Cross Stitch Kit: Embroidery Starter Kit contains 1 wooden hoop (8"), pre-marked fabric, 2 embroidery needles, 12 color threads, and Step-by-Step instruction
- 【Size and Package】13.8x13.8 inch,2pc cross stitch needles, enough thread already sorted, English instructions,cross stitch patterns instructions,and 11CT Pre-printed stamped cross stitch fabric...
- 【Crafted with High-quality Materials】 Our beginner stamped cross stitch kits include everything you need to get started. Each kit comes with clearly marked grid lines on 11ct fabric, making it...
- 【Stamped Cross Stitch Kits for Adults】 Designed specifically for both beginners and experienced crafters alike. These easy DIY counted cross stitch kits feature beautiful printed patterns that...


