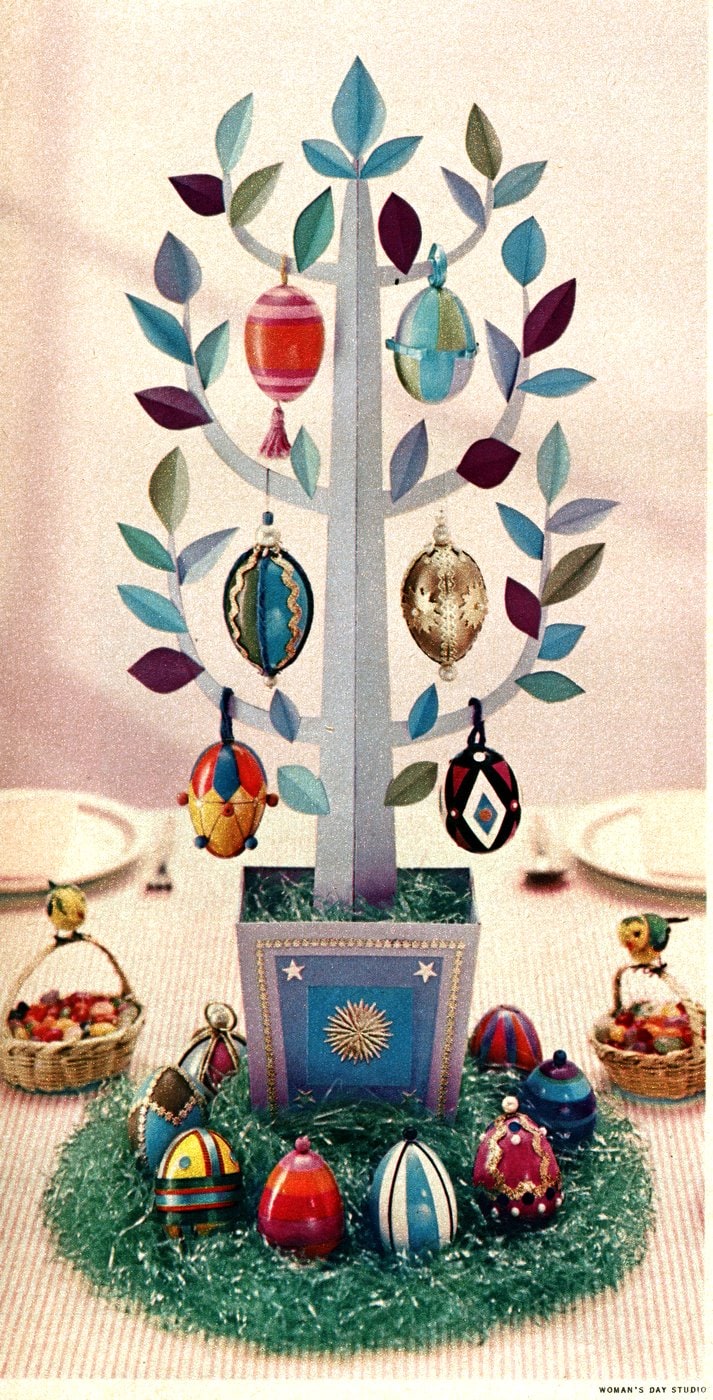
The idea was simple: decorate blown-out eggs with paint and trim, then hang them on a tree form made from poster board or a spray-painted branch. The eggs were painted using poster paint (with a touch of glycerin mixed in), then sealed and decorated with anything from sequins and paper ribbon to yarn and colored paper. Hanging them was made easy with florist wire bent into a tong shape to support the eggs while they dried. Once finished, the eggs could be arranged on the tree to create a showy centerpiece that could be packed away and used again next year.
We’ve reprinted this 1950s Easter egg tree craft straight from the original instructions, including suggestions for modern materials where needed. It’s a fun way to bring a little vintage flair to your springtime celebrations.
Easter egg tree: A vintage craft project from 1958
The tradition of coloring eggs at Easter time inspired this lovely centerpiece which you can make and use year after year.
Materials you will need:
eggs
poster paint
gold spray
small artist’s brush
clear fingernail polish [Modern-day recommended alternative: Mod Podge]
casein glue [white glue recommended]
florist wire
poster board (for tree)
Trimmings:
beads
sequins
paper ribbon
yarn
gummed gold paper trim
colored paper
rickrack

How to make your Easter egg tree
Carefully puncture each end of raw egg with small sharp-pointed screw, turning screw gently in hole; empty contents of egg into dish by blowing through one end.
Bend a 15″ length of florist wire into tong shape to hold egg through punctured ends while painting, drying, and trimming it. With a pencil, mark out design to be painted on egg.
To make the paint adhere better, add one or two drops of glycerine to each tablespoon of paint. After painting, hang egg up to dry by looping string through tong handles.
When dry, coat entire egg with clear nail polish [Note: non-toxic Mod Podge recommended instead], and when that is dry, glue on trimmings as shown in the picture above, or according to your own design.
A look back at Easter in the 1950s


